
Floor heating mistakes you can’t fix once the slab is poured
The short answer
The mistakes you can’t fix are the ones under the concrete. Leave out the insulation under the heated layer or down the slab edge and up to 70% of the heat you pay for can go into the ground, and one uninsulated edge touching a path or a pool can double or triple the bill. Pipes cast into a suspended slab, a screed laid without insulation or expansion joints, and a pipe layout nobody designed are the other three. Once the slab is poured, putting any of them right means lifting the floor.
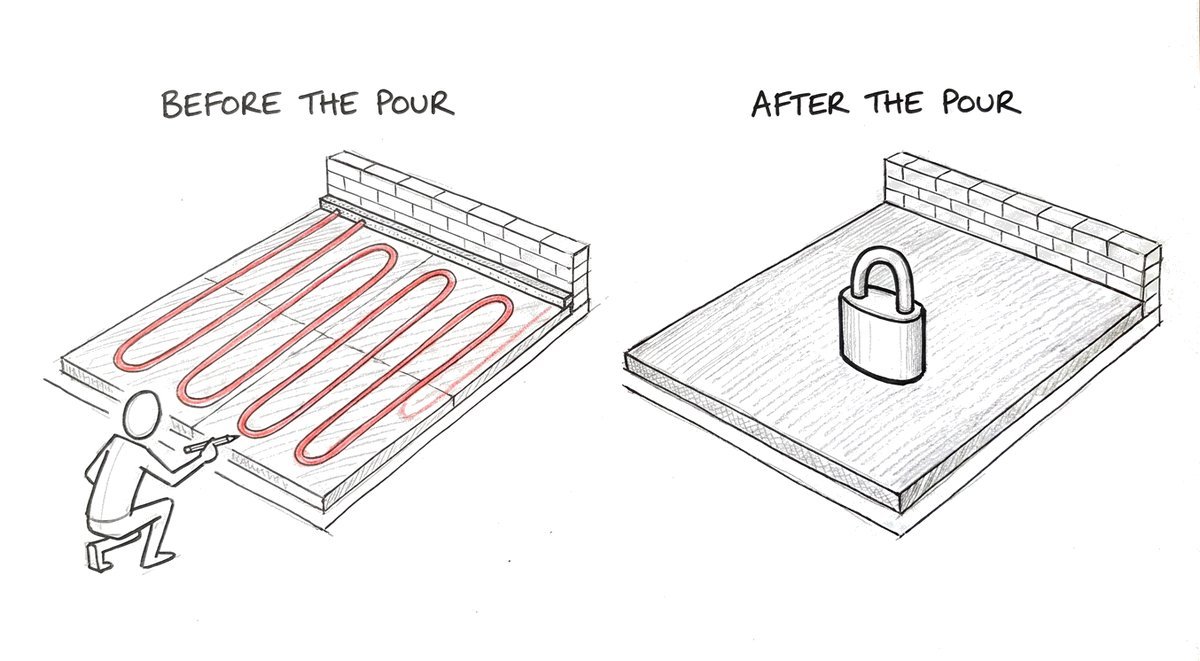
We’re often asked to look at a floor heating system someone else put in, usually in July, because the floor is lukewarm and the power bill isn’t. The installer has nearly always done what the quote said. What went wrong was never on the quote, and by the time anyone notices, it’s under concrete. These are the mistakes you only get one chance to avoid.
Why can’t a floor heating mistake be fixed later?
Because everything that decides how the floor performs is buried, and none of it can be reached afterwards without a jackhammer. Phil tells the story of a structural engineer who rang him after a job done with another installer. There were cracks right through the house, steps between sections of the heated floor and spots that sounded hollow underfoot, and he wanted to know how to fix them. Phil’s answer: “unfortunately I had to tell him you can’t really fix them unless you pull up the whole floor.”
So in practice nobody fixes a buried mistake. People run the system for a winter or two, wince at the bills and switch it off, and we see it happen every year.
Mistake one: no insulation under the heat, or down the slab edge
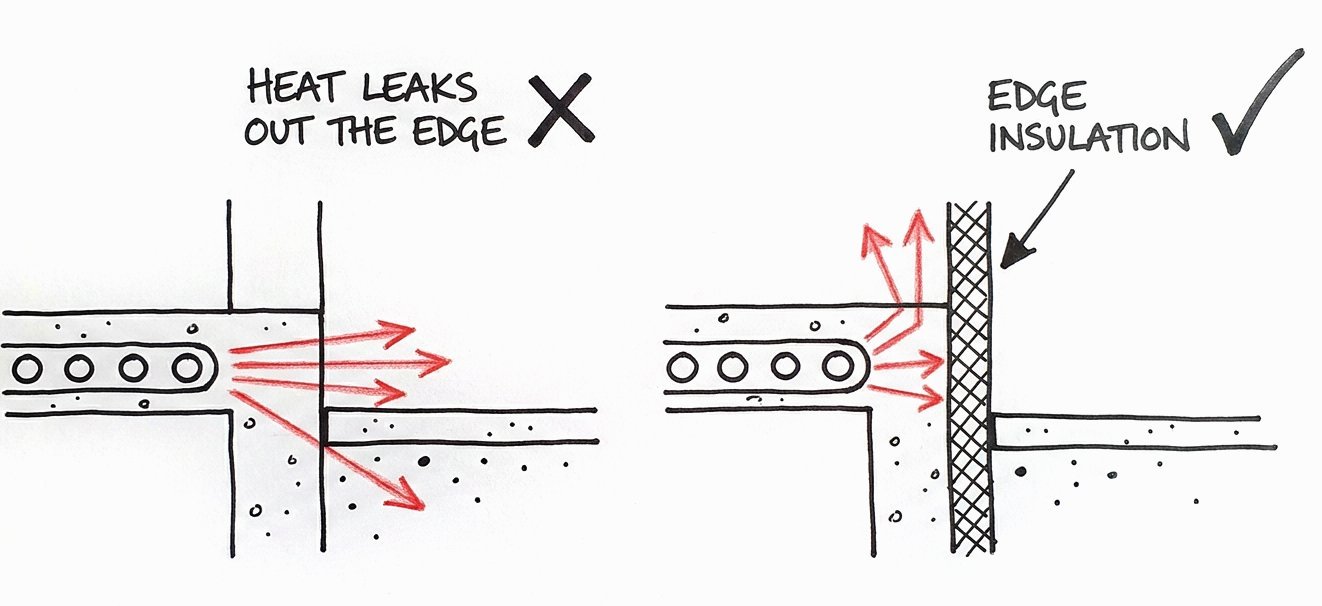
Heat moves to wherever it’s coldest, and under a Perth house that’s the ground. Pipe laid in a slab with nothing underneath and nothing around the edge can lose up to 70% of the heat you pay for into the sand and the footings. Perth’s dry sand is no insulator, whatever you’ve been told. Rigid insulation under the heated concrete and down the slab edge is what sends the heat up into the room instead.
The edge is where people get caught. The building code already asks for insulation of at least R1.0 down the edge of a heated slab on the ground (NCC 2022, Housing Provisions 13.2.6, applied in WA since May 2025), and it’s still often missed. Where the warm slab runs straight into an alfresco, a concrete path or a pool surround, the heat walks out through the join, and that one detail can double or triple the running cost. We explain these leaks in what a thermal bridge is.
Mistake two: pipes cast into a suspended slab
A suspended slab is a concrete floor with air or a room underneath it: the upper floor of a two-storey house, or a floor over a garage. Casting heating pipe straight into one is quick and cheap, and it’s the mistake that costs the most to live with. A typical Perth suspended slab is about 257 millimetres thick, and as Phil puts it, every four square metres of it is 2.4 tonnes of concrete to warm. It takes hours, often days, to respond, and with its underside open to the garage or the outside air, much of the heat goes down instead of up.
The fix costs a little more and is decided at the design stage: an insulated screed on top of the suspended slab, so the heat has only one way to go.
Mistake three: a screed laid without the details
A screed is the thin layer of concrete-like topping the pipes are set in, laid on insulation over the main slab. Phil compares a good one to an Esky with the heating in the bottom, insulated underneath and around every side, so the heat stays in. Most screed problems come from breaking that seal.
The commonest is a screed poured straight onto the slab with no insulation between them, so the two bond into one thick lump and you’re back to heating the slab. The next is insulation left out in patches, usually under the kitchen island or built-in cupboards. Heat leaks through the gap, and the screed, stuck to the slab in one spot and free to move everywhere else, cracks along the line.
Then there’s movement. A heated screed grows and shrinks by a millimetre or so as it warms and cools, so it needs a soft foam strip around every wall and expansion joints through the doorways. In Phil’s words, “something’s got to give. And so, you have to allow that give. But when you don’t, what will happen is it will give itself.” Without them you get cracked tiles, a step between two sections of floor or a drummy sound underfoot. Done well, the joints sit in the grout lines and you’ll never find them.
 14 min
Mistake four: a pipe layout nobody designed
The pipe layout looks like the simple part, and it’s where quiet compromises go in. Clients sometimes ask us to keep pipe a metre and a half off the walls, or to leave out the laundry to save a few metres. Phil’s experience is that pulling pipe back saves nothing, because the thermostat keeps calling for heat and the water has to run hotter. And people who leave rooms out nearly always tell us years later they wish they hadn’t. A spare room can be turned off at the manifold, like a tap; a room with no pipe stays cold for good.
A designed layout matches each room’s heat loss, with closer pipe where there’s a lot of glass, and keeps every loop to a sensible length (ours are 100 metres at most) so the water doesn’t arrive cold at the far end. Each loop is pressure-tested before the pour and kept under pressure while the other trades work, so an accidental hit shows up straight away. The balancing can be adjusted for decades. The loops can’t.
What can still be changed after the pour?
Not everything is permanent. A heat pump boxed into a side path or a store room can lose up to half its efficiency, and a thermostat hidden in a cupboard will over- or under-heat the house. Both cost money to move, but they can be moved. Our free guide to the five floor heating mistakes covers all five, with the physics behind each.
Other questions people ask us
Can a plumber install floor heating?
Plumbers lay pipe, connect manifolds, fit heat pumps and pressure-test systems every week, and do it well. A standard installation covers those physical steps, not the engineering that makes them count: the heat-load calculation, the insulation and slab-edge details, the screed design and the balancing. Ask whoever quotes who does that part.
How can I tell if an installer knows what they’re doing?
Phil has two quick tests. Look at the photos of their screed jobs for the foam strip around the walls. And ask what water temperature the floor is designed to run at: a shrug, or an answer of 60 degrees or more, is a red flag. Our Quote Comparison Decoder shows what a written quote leaves out.
Our slab is already poured. Is it too late?
If the slab is down but the floors aren’t, an insulated screed on top can still work, as long as the floor and door heights can take the extra build-up. If the house is finished, radiators are usually the better way to the same kind of warmth.
What does balancing a floor heating system mean?
Every loop of pipe starts and ends at the manifold, and balancing sets how much water goes through each one, so short and long loops all deliver their share. A system that was never balanced tends to have one room too warm and another that never gets there. It’s set at commissioning and can be redone at any service, with nothing dug up.
Where to go from here
If you’re building in Perth or the south-west, the 5-minute quote gives you your options in writing within 3 working days, each with its price and a modelled running cost, and you don’t need final plans to start. If you’d rather check your own build first, the Thermal Risk Scan finds the risky details in your design before the slab goes down, and the Slab Pour Deadline Checker shows which decisions are still open.