
Floor heating installation, step by step: from the sand pad to the first warm morning
The short answer
On a typical Perth slab it happens in a few short visits that slot into the builder’s programme. The builder prepares the sand pad, we lay the insulation in about a day, the builder adds plastic and mesh, and we clip the pipes to the mesh, pressure-test them and certify them in about three days. The builder pours with the pipes still under pressure, so any damage shows at once. Months later, once the house is at lock-up, the heat pump goes in, the system is commissioned and balanced, and the first heat-up is a slow, gentle one.
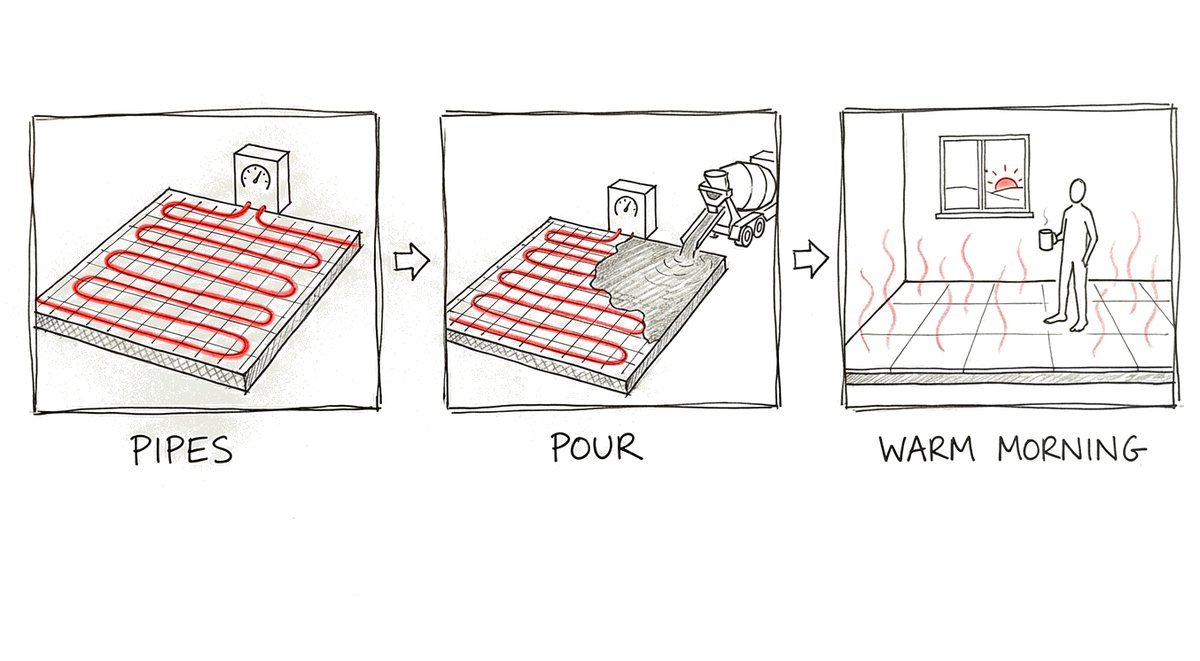
If you’ve never built with floor heating, it’s hard to picture where it fits among the concreters, framers and plumbers. Most of it happens in one short window before the slab is poured, and the rest waits until the house is nearly finished. Here’s the order on a typical Perth slab-on-ground with the pipes cast in.
What has to happen before anyone arrives on site?
The design comes first. The heat-load calculation, the pipe layout and a written slab specification go to the builder well before the pour, so the concreter can price a heated slab: thicker, with heavier mesh and insulated edges. The builder also gets a short list of works: cables, power and a water feed at the manifold and heat pump positions, a concrete pad for the heat pump and a drain beside it. It also helps if the walls and built-in joinery are marked out on site before we start, so the loops follow the real rooms.
Sand pad, insulation and mesh
The builder prepares the sand pad as usual, allowing for the thicker heated slab. We lay the insulation over the level pad, which takes about a day on a typical house. The builder’s team then covers it with the plastic membrane and the reinforcing mesh, one grade heavier than an unheated slab would get. The mesh sits high enough in the slab that the pipe clipped on top of it ends up with a proper cover of concrete over it.
On a screed floor the order moves up a level: the slab is poured first with a set-down, and the insulation, pipes and screed go on top later, with a foam strip round every wall and column so the screed can move a fraction as it warms without cracking.
The pipes, and the pressure test that stays on through the pour
We clip the pipes to the top of the mesh in loops, each one running out from the manifold and back again, then fill the system and pressure-test every loop. On a typical house that’s about three days. The layout is photographed and documented, and we sign it off in writing before the builder books the truck.
This is the step that protects everyone on the job. The pipes stay under pressure through the pour and while the concrete cures, so if anything damages one, the gauge drops and the water shows it straight away. It’s found on the day, while the people who did it are still standing there, and repaired before anything is built over it, instead of under a finished floor two winters later.
 2 min
2 min
The pour, and the months after it
The builder pours and the house goes up as normal. The heating sits quiet for months, with one rule for every trade on site: nobody drills, cores or pegs into the heated floor without checking the pipe layout first. A screed adds a second rule. It needs about 28 days before heavy loads go on it, and the heating is never switched on to dry it faster, because that’s how screeds crack.
Commissioning: when the house becomes warm
Once the house is at lock-up and the power is live, the heat pump goes in. Commissioning waits until the floor coverings are down, because the system is tuned to the floor you actually walk on, and it takes at least a full day. Each loop is balanced so the far rooms get their share, the heat pump is set to the lowest water temperature that does the job, and the controls are tuned to how fast this particular floor warms up.
When the owners move in, they get a walk-through of the controls and the papers for the building file, including the as-installed pipe layout.
The first warm morning
The first heat-up of a new floor is a gentle one. From stone cold, a slab or screed takes hours to come up to temperature, and our controls ramp the heat pump up and down slowly rather than in big swings. After that the floor stays warm in the background, and a warm floor answers a call for heat quickly: about 15 to 30 minutes for an insulated screed, and about 45 for a slab on the ground.
Most owners make a few small adjustments in the first winter as they learn how the house behaves, and we come back during that first heating season to check the system is doing what it was designed to do. After that, it’s switched on at the start of each winter and left to get on with it.
Other questions people ask us
How long does floor heating installation take?
On a typical house, about four days on site before the pour and about three at the end for the heat pump and commissioning, spread over the months the house takes to build.
Can the heating be used to dry out a new slab or screed?
No. Heating a floor before it has cured can crack it. The first heat-up waits until commissioning, and even then it’s slow.
What does the builder need to provide?
A sand pad allowing for the thicker slab, the plastic and mesh, and the power, cables, water feed, pad and drain for the heat pump and manifold. The list comes with the quote, so it can be priced in.
Where to go from here
If you’re building in Perth or the south-west, the 5-minute quote gives you your options in writing within 3 working days, each with its price and a modelled running cost, and you don’t need final plans to start. If the pour date is already set, the Slab Pour Deadline Checker shows which decisions are still open, and builders can get the full stage-by-stage pack from our page for builders. For the timing side, see when to decide with a Perth builder.